Saturday, May 29, 2010

Goat Cheese Tart

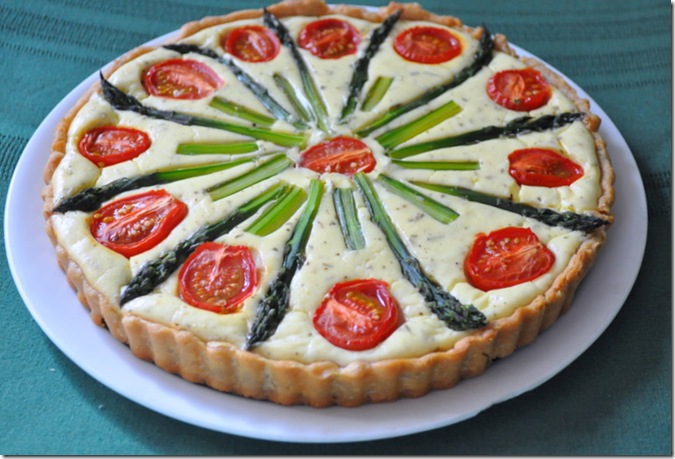
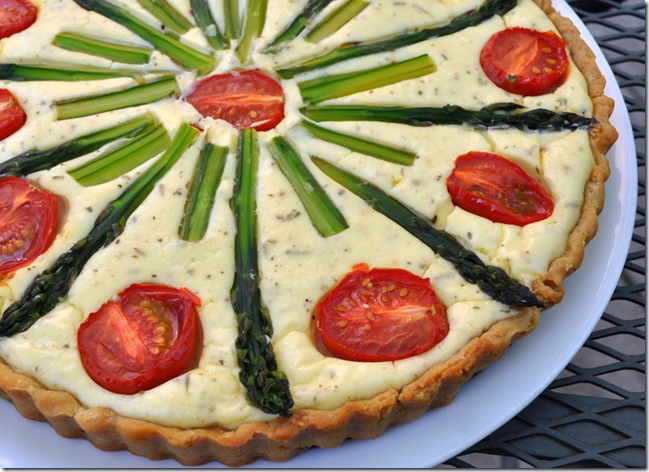
May 2010 354 So much of my cooking is determined by what items need to get used up before they turn into refrigerator “mummies” worthy of an archeological dig. So it was with a large log of goat cheese that I had bought recently. Enough with the goat cheese and beet salad, much as I love it. Time for something different.

Once I saw Marie’s ricotta cheese tart on Proud Italian Cook, I had all the inspiration I needed. It not only looked sensational, but I knew it would taste terrific. Everything Marie makes is wonderful.  Another time I will try her recipe verbatim, but this time I substituted the goat cheese for the ricotta she used and added another egg to lighten it up, along with a few herbs to brighten the flavor.

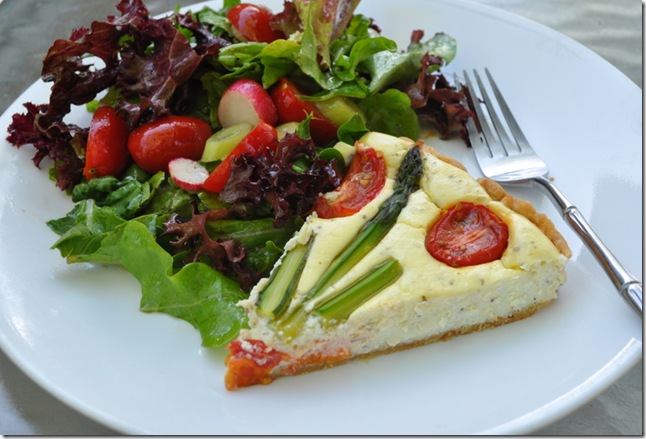
With a salad of fresh garden greens by its side, it made a perfect dinner, but I could also see small wedges of this as an appetizer. Or bake it in a square or rectangular tart pan and cut into squares for bite-size nibbles. Of course, if you don’t like goat cheese, you’re not going to like this tart. In that case, follow Marie’s example and stick with the ricotta.
May 2010 366

Here’s another idea using that asparagus spoke design: a beautifully prepared asparagus and leek quiche made by Stacey Snacks, another one of my favorite food bloggers. If only I’d had an excess of leeks and gruyere in the fridge instead of goat cheese. Next time.

image  Either way, stay with the arrangement of asparagus spears and small tomato halves. It’s almost too pretty to slice into. ….Almost.

May 2010 358

Goat Cheese Tart

soft goat cheese at room temperature (about 10 to 12 ounces)

3 large eggs

1 crushed garlic clove

Zest of one lemon

Salt and pepper to taste

1 T. dried herbs de Provence or minced fresh herbs

asparagus stalks, peeled and blanched for a minute or two

small tomatoes, like Campari tomatoes, cut in half

Partially cooked tart shell (I bought pie dough in the refrigerated case and baked it about 10 minutes)

Pre-bake the tart shell and let it cool. Mix the goat cheese until smooth with the garlic, lemon zest, herbs, salt and pepper and pour mixture into pie shell.

Arrange asparagus and tomato halves on top and sink them slightly into the ricotta.

Bake in a 375 degree oven until crust is golden and goat cheese is set – about 30 to 45 minutes.


Technorati Tags: ,

Wednesday, May 26, 2010

Baci Di Dama

May 2010 288

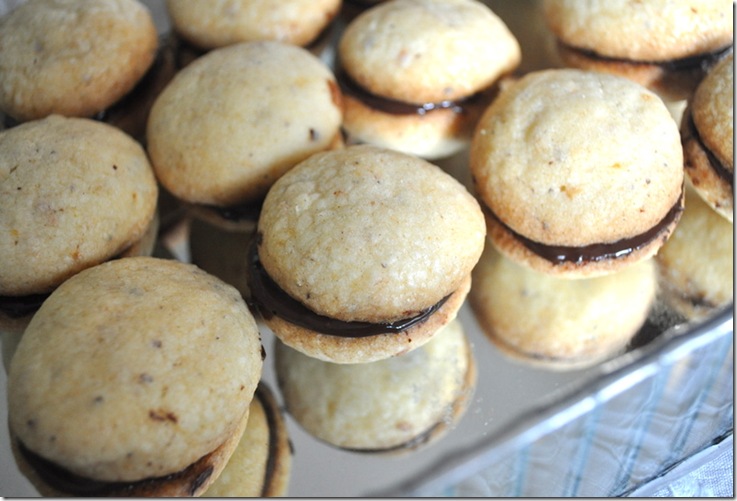
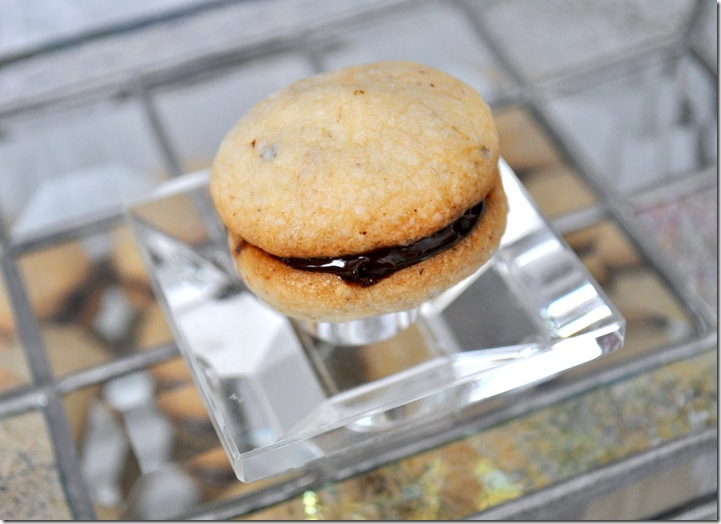
I don’t know about you, but when I sit down with a cup of tea or coffee, I want a little nibble to go with it. When you’re ordering an espresso in Italy, it’s easy to find bars that offer a selection of miniature goodies including these little cookie nuggets called baci di dama – or ladies’ kisses.

I don’t need a humongous slice of layer cake slathered with frosting. Just give me a few little cookies to satisfy my sweet tooth.  Look at this photo with a plate of small cookies including baci di dama , resting next to two cups of macchiati (plural of macchiato, which is an espresso with a touch of steamed milk. Macchiato literally means stained in Italian). One reason you gotta love Italy is for the coffee. Aside from the quality, which puts Starbucks and most other U.S. coffee joints to shame, the price is so reasonable. 

image You can see from this photo we paid only 3 euros and 60 cents for two outstanding macchiati . That would have been about $5.00 U.S. Plus they brought us a couple of glasses of water and a small plate of delicious little cookies,  including baci di dama, for free. Oh yes, and a little extra warmed milk if we needed it.  How civilized!

Now, truth be told, in Italy it’s not typical to get such a nice dish of cookies for free at your local neighborhood bar. The photo was taken in the cafe of the castello in Ferrara. But baci di dama can be found in many bars and bakeries all over Italy.

I was long overdue making baci di dama myself, so I started out by searching the web and came up with this recipe from Epicurious.com. But after reading some of the reviews from people who had used the recipe, I decided to make some adjustments, including the addition of baking powder, more butter and more hazelnuts.

May 2010 301

The cookies should be a little more spherical than mine, but part of the problem was that I rolled the dough into balls that I thought were small enough, but really weren’t. They spread a little and they’re fine that way, but if you make them smaller – more like the size of a large marble – you’ll get a cookie that is closer to the authentic baci di dama you find in Italy.

May 2010 272

Baci Di Dama

Printable Recipe Here

  • 1 cup hazelnuts, toasted , any loose skins rubbed off in a kitchen towel, and cooled
  • 1 cup confectioners sugar
  • 2 sticks (1 cup) unsalted butter, well softened
  • 1/4 teaspoon finely grated fresh lemon zest
  • 1/8 teaspoon salt
  • 1 cup flour
  • 1/2 tsp. baking powder
  • 3 ounces dark chocolate, melted  (Melt chocolate in the microwave over low heat, or in a metal bowl set over a saucepan of barely simmering water, stirring occasionally, until smooth)

    Preheat oven to 350 degrees. Grease cookie sheets with butter or line with parchment paper.

    Put nuts into food processor with confectioner’s sugar and pulse until finely ground. Don’t let it become a paste.

    Place the softened butter, zest, salt, and nut mixture in a mixing bowl and beat until creamy. Add flour, and baking powder, stirring until mixed.

    Form little balls the size of marbles (I made mine bigger but they get a more rounded appearance if they’re smaller.) Place on greased baking sheets and bake, one sheet at a time, until pale golden brown, about 15 minutes. Cool, then spread a little melted chocolate on one half and press a second cookie onto the other side.
     

    Technorati Tags: ,

  • Saturday, May 22, 2010

    Crostini Time

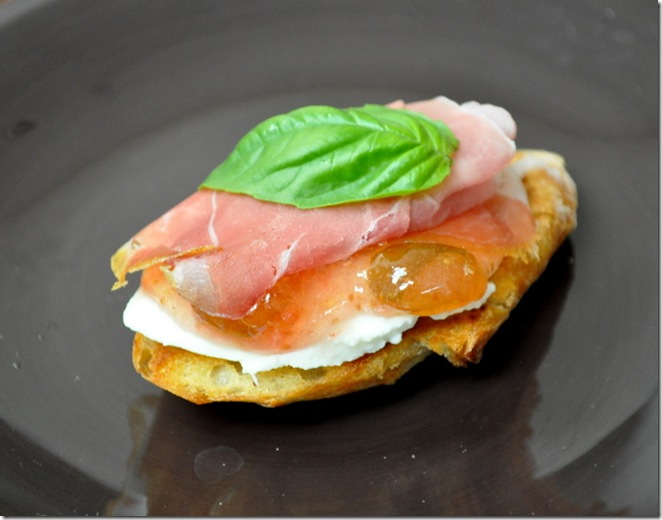
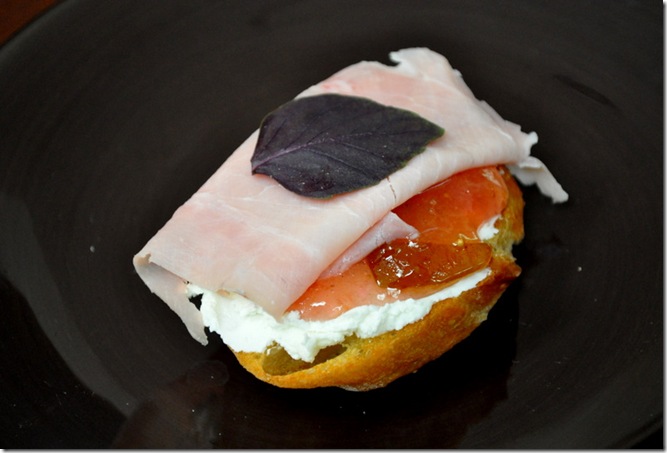
    May 2010 337 Crostini – or “little toasts” – are one of the easiest ways to create a quick appetizer for guests or a fast lunch for yourself.  I still had some fig jam left over from last year’s batch and used it for a sweet and savory crostino (singular of crostini) with prosciutto crudo, mozzarella cheese and a fresh green basil leaf. The inspiration for this one came from a wonderful blog called The Italian Dish.

    But I got to thinking that this might also be good with prosciutto cotto (a very delicate and perfumed baked ham from Italy). If you can’t find prosciutto cotto, my supermarket also sells something called “French ham” which is nearly the same. Even though this may look like it, don’t use plain old baked ham. The flavor pales in comparison. Rather than the mozzarella, with this one I used goat cheese (ricotta would be another great choice for either of these) and some purple basil from the garden, along with a smidgeon of the fig jam.

    May 2010 338

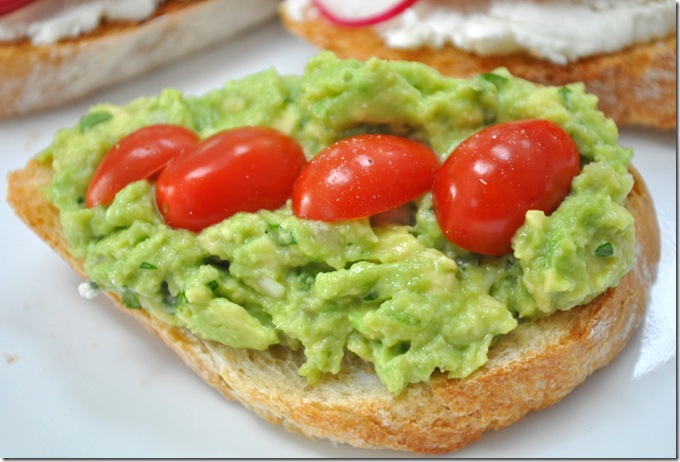
    But there’s no crostini rule that says you have to go Italian. This avocado and tomato crostini was really refreshing. Just smashed avocado mixed with a little garlic, salt, pepper, chopped jalapeno and cilantro.

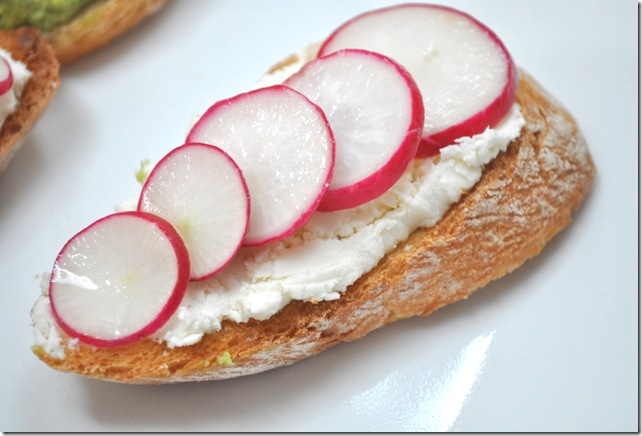
    lunch 4 Or how about this one, which is more like a French tartine: some goat cheese and sliced radishes, straight from my friend Dorothy’s garden:

    lunch 5 The possibilities are endless beyond the ubiquitous rubbed garlic, tomatoes and basil. Just start with some sliced bread that’s been grilled or toasted with a little olive oil and use your imagination – zucchini, olives, pistachios – anything really. Inspiration can come from leftovers or something you just dreamed up. Either way, it makes for a fast and easy lunch or appetizer.

    Here’s a little chart to give you some other ideas. Mix and match and come up with your own version.

    A. Bottom Layer:                                                                               B. Top Layer

    mozzarella cheese                                                                             grilled zucchini

    goat cheese                                                                                          chopped sun dried tomatoes

    smashed avocado mixture                                                            caramelized onions

    melted fontina cheese                                                                      leftover ratatouille or tapanade


    Tuesday, May 18, 2010

    How To Trim An Artichoke/Artichoke Risotto

    May 2010 235

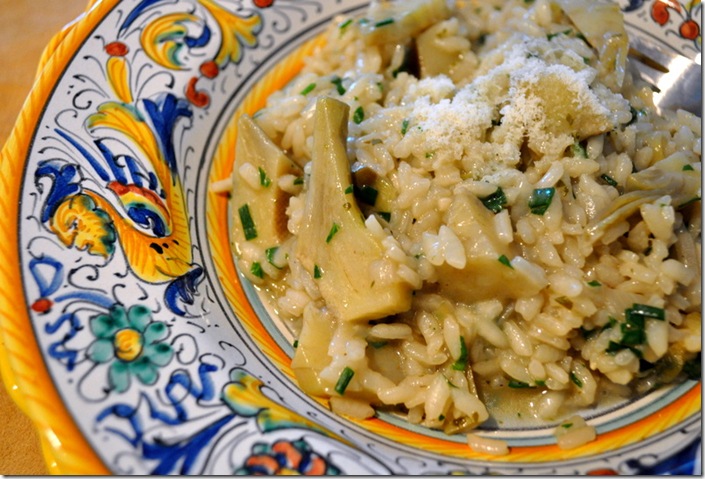
    If you’ve never had risotto made with fresh artichokes, get out there now that artichokes are in season and so reasonably priced. Sure you can use frozen artichokes and the result would be good (don’t try the canned ones for this recipe) but fresh artichokes elevates this to a different level.

    Wegman’s Supermarket recently had artichokes on sale at 2 for $1.00 – a real bargain. The low price gave me the incentive to try something besides the stuffed artichoke recipe that’s a standard in our house. Trimming the artichokes does take a little time, but you’ll be rewarded with the unparalleled flavor of fresh artichokes. 

    I’ll take you through the process, step-by-step.

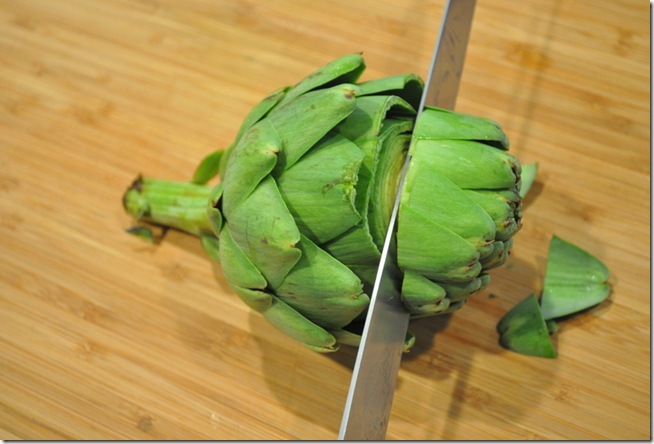
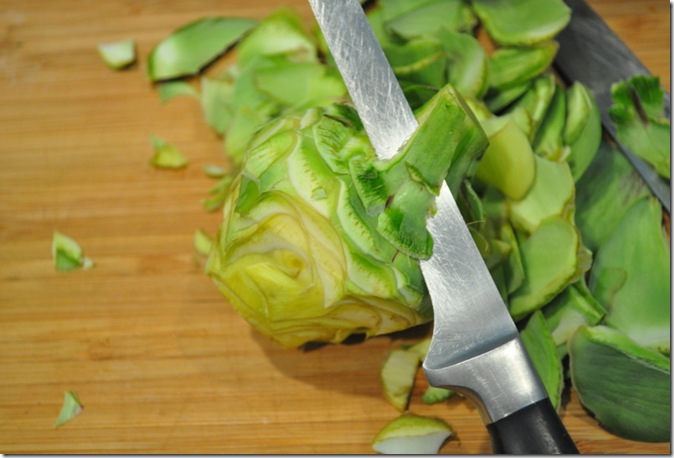
    First slice off the top 1/2 to 1/3 of the leaves. Reserve all those pieces you chop off. I’ll show you what to do with them later.

    May 2010 216

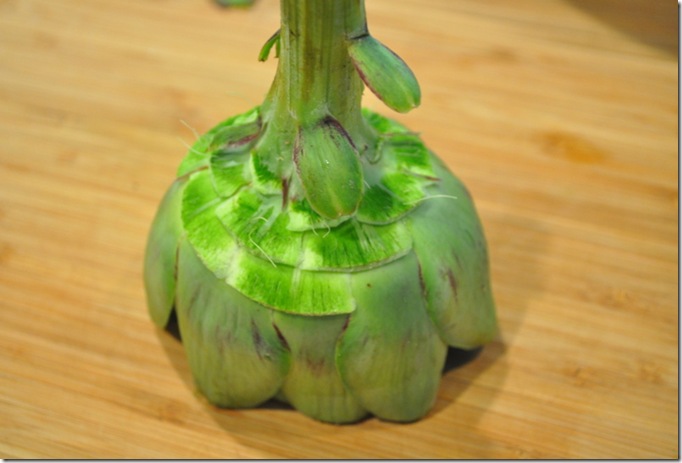
    Then peel away the lower level or two of leaves.

    May 2010 217

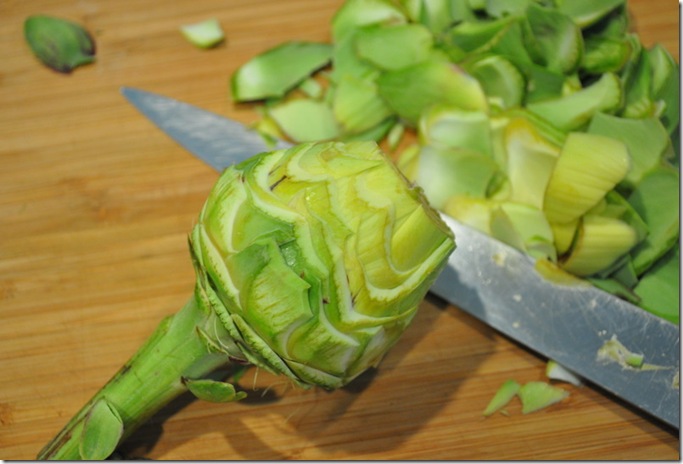
    Using a sharp knife, start slicing through the woodier portion of the leaf and leave only the more tender parts of the artichoke.

    May 2010 218

    Slice off most of the stem.

    May 2010 219

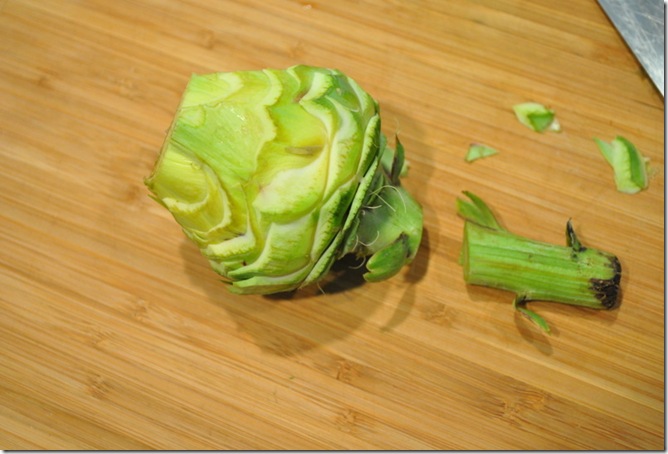
    Take a smaller knife and trim the remaining stem and the bottom of the artichoke.

    May 2010 220

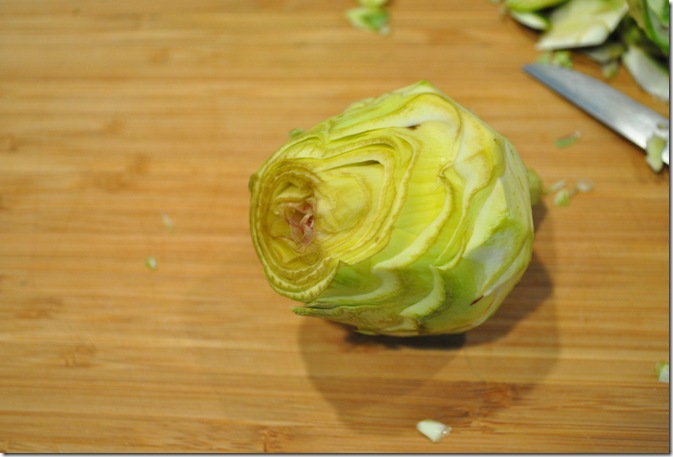
    This is what you’ll be left with. In Italy, you see vendors at outdoor markets trimming baskets full of artichokes and selling them already cleaned for you.

    May 2010 221

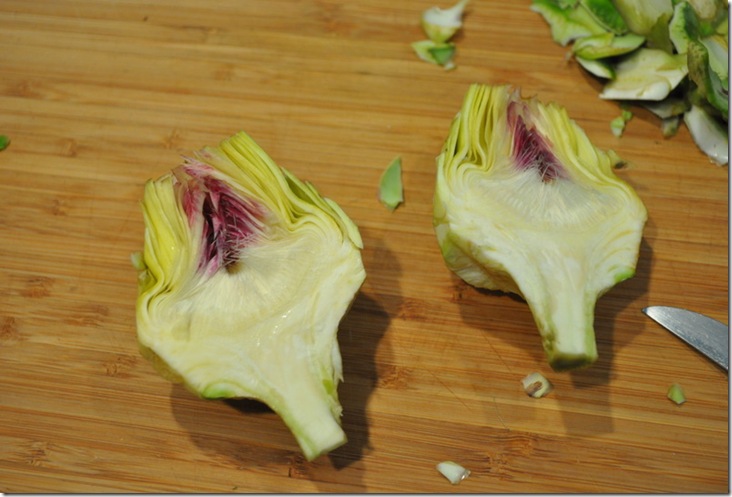
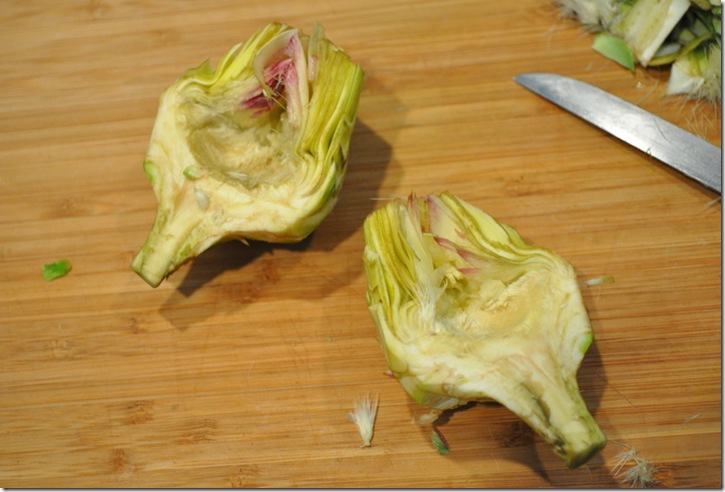
    Next I slice open the artichoke and you’ll see the fuzzy choke inside.

    May 2010 222

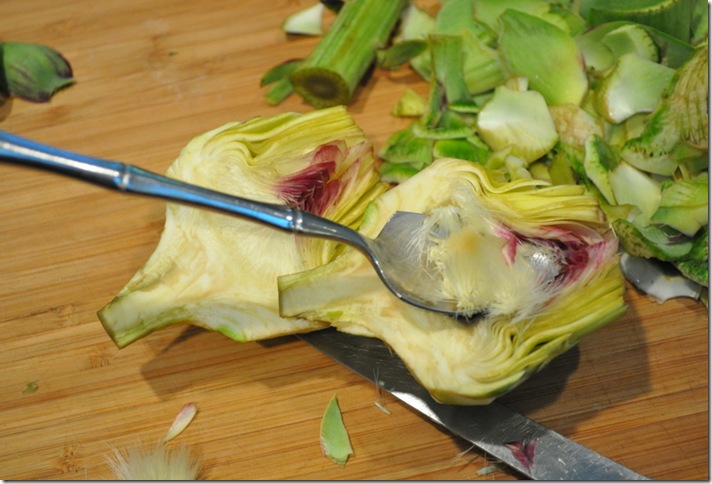
    Take a grapefruit spoon and remove the choke.

    May 2010 223

    Here’s what it looks like when it’s fully trimmed. You have to work fast since as you can see, the artichoke starts to turn brown quickly. Don’t worry about that too much. Once you cook it, it won’t matter.

    May 2010 224

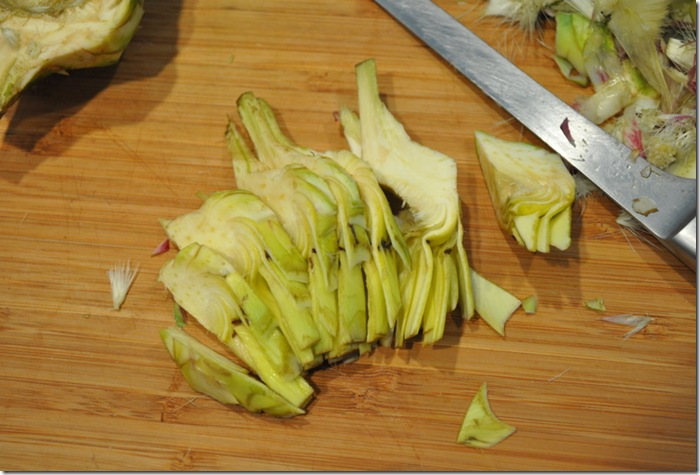
    For risotto, I sliced the artichoke in thin pieces. In Italy you can buy really tender artichokes – so tender that slices like these are tossed with olive and vinegar and served raw in salads, with shaved parmesan cheese.

    May 2010 225

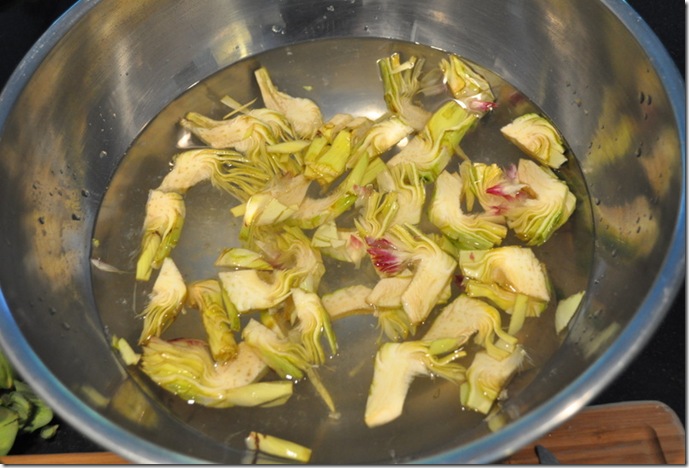
    Put the sliced artichokes in a bowl of water that has half a lemon squeezed into it to help stop discoloration. These are now ready for your risotto recipe.

    May 2010 226

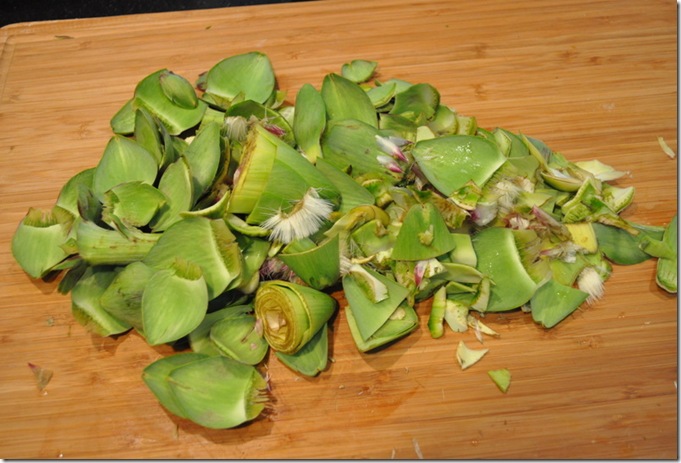
    Oh yeah, what to do with all those leaves and bits you trimmed?

    May 2010 227

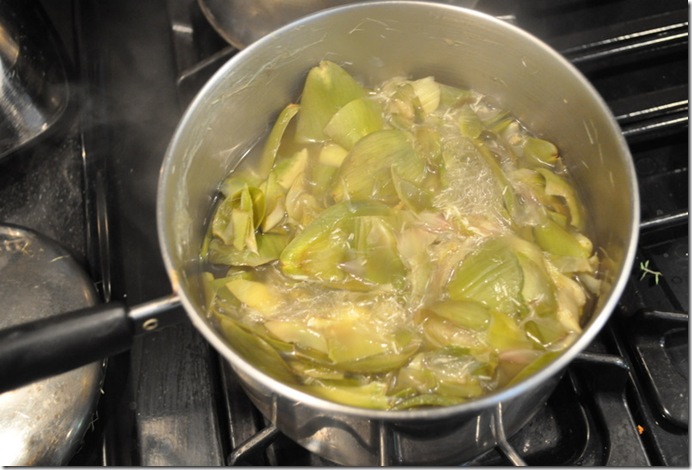
    Put them in a pot of water and get them boiling while you prepare the beginning of the risotto recipe. You’ll use this broth in the risotto. It adds a lot of flavor, even though it will cook for only 20 minutes or so.

    May 2010 229

    OK, now let’s get the risotto going. Start out by sauteeing the shallot and the garlic until limp. Drain the artichoke slices and add them to the vegetables, along with some white wine and a little chicken stock. You don’t really even need the chicken stock. I just happen to have a little left over from some soup made earlier in the week. Use water if you don’t have stock.  Keep the artichokes covered in liquid and in about 15-20 minutes they’ll be cooked through.

    May 2010 228

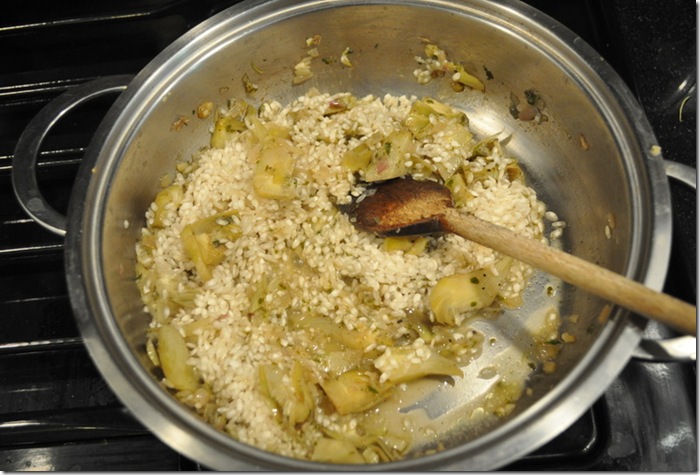
    Now just follow the standard risotto technique. Add the rice and a little bit of the hot artichoke broth. Stir and let the liquid get absorbed before adding more ladles of broth. Keep doing that for about 20 minutes or until the risotto is cooked but not mushy.

    I add the fresh herbs after turning off the heat, in order to retain maximum flavor and the bright green color.

    May 2010 230

    Top with parmesan cheese and enjoy!

    May 2010 234 

    Artichoke Risotto

    (enough for two to three people)

    Printable recipe here

    2 fresh artichokes, trimmed and sliced

    1 shallot, minced finely

    2 cloves crushed garlic

    1 1/2 cup arborio rice

    2 T. olive oil

    1 T. butter

    1/2 cup white wine

    1/2 cup chicken broth (I just happened to have this leftover from something else but you can use water if you don’t have it)

    broth from artichoke leaves (about four or five cups)

    minced fresh herbs (thyme, parsley is what I used)

    salt, pepper to taste

    1 T. butter

    parmesan cheese

    Trim the artichokes and put all the trimmings in a pot of water. Boil it on high heat for 15-20 minutes. Meanwhile, get the risotto going. Place the butter and olive oil in a pan and add the shallots and garlic. Cook until limp, then add the artichoke pieces, the white wine and chicken broth. Simmer over medium heat until artichoke pieces are almost cooked through – this will take about 15 minutes. Season with salt and pepper. Stir in the rice and keep adding some broth from the pot you’re cooking containing the discarded artichoke leaves and water. Continue adding this broth and stirring the risotto until the rice is cooked (about 20 minutes). Remove from heat. Stir in the fresh herbs, the 1 T. butter and the parmesan cheese. Serve.
    Saturday, May 15, 2010

    Lawn to Food and a Spinach Salad

    May 2010 250

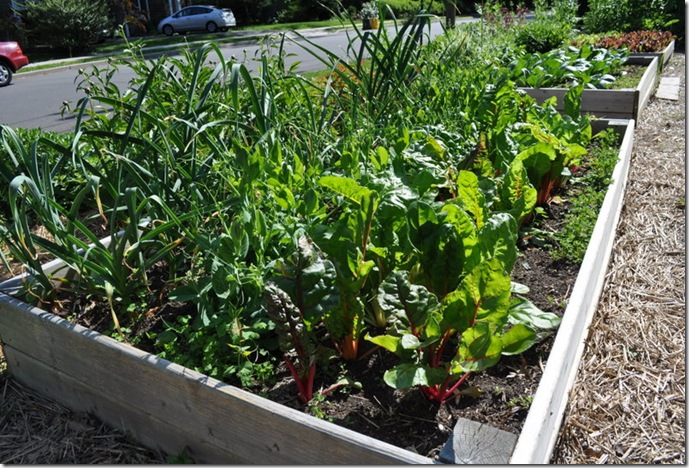
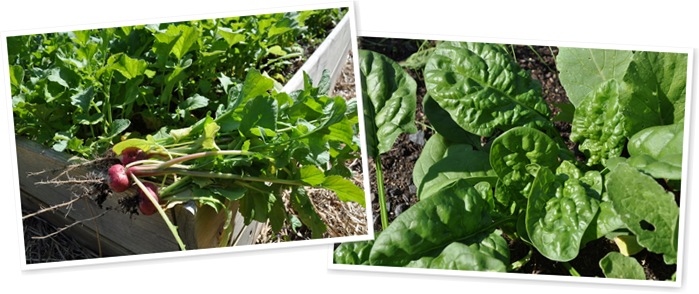
    OK, so I’m not reinventing the wheel here with this spinach salad, but I just had to show you how one person can make a difference in healthier eating, not just in her own family, but in a whole community. Several years ago, my friend Dorothy knew nothing about organic gardening but that changed after she read a library book on the subject. She put that knowledge to practice and has cultivated the most prolific garden in her sunny front yard for at least six or seven years now. She generously encourages neighbors to pick some of the vegetables, herbs and flowers and even provides them with scissors to do it.

    Look how big this swiss chard is already – and this photo was taken nearly a week ago in central New Jersey!

    May 2010 188

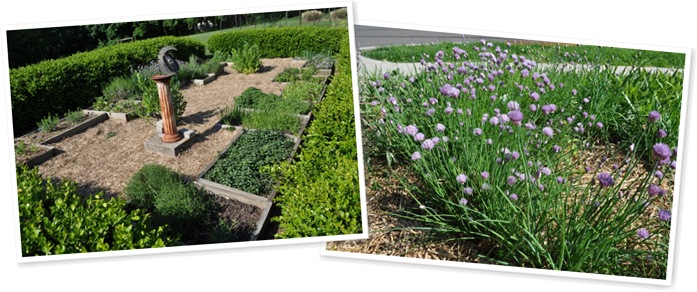
    A few years ago Dorothy took her knowledge to the local schools and created gardens right on the school grounds for children to learn where vegetables really come from and to encourage healthier eating. It’s only early May and already the plants are way ahead of my backyard garden. Lettuces, spinach, arugula are ready to pick. Chives are in full flower. Radishes are ready for harvest and lots of herbs too.

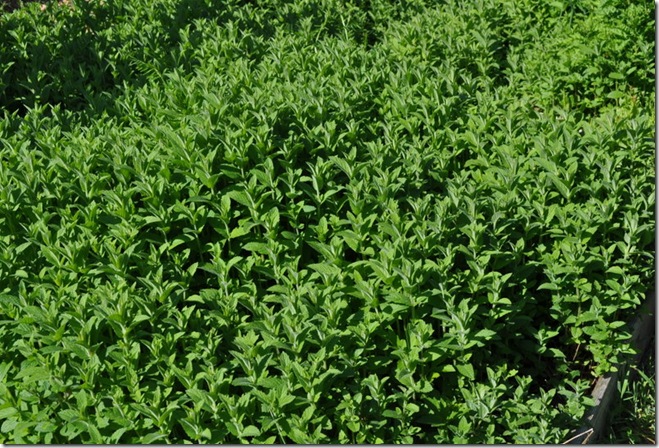
    The mint at the school grows in abundance, and is used by the owners of The Bent Spoon ice cream shop in town, who churn most of the profits from their mint chocolate chip ice cream back to the school gardening project. It’s a win-win situation for everybody, especially those of us who love The Bent Spoon’s ice cream.

    May 2010 209 But Dorothy’s gifts don’t stop with the gardens. I wrote about her in the early days of my blog before I had many readers, so it’s worth repeating myself now. Dorothy is a holistic health care practitioner, and also can take credit for helping people with addictions of any kind - cigarettes, alcohol, food - move past them and live a healthier life. Through a program called Suppers For Sobriety that she conceived while working on her masters degree in counseling, members can learn how to move past their addiction and turn around years of damage to the body and spirit. It all starts out one supper at a time. According to the website, SuppersforSobriety.org, the format includes preparation of a simple, stability-promoting meal, a brief meditation or stress management exercise, time to share, and the Suppers forum, which involves readings of materials that may help people in recovery find the help they need. Some meetings also include outdoor walks or cooking lessons.
    The only requirement for membership is the desire to lead a healthier life in body, mind and spirit, Dorothy says. "If you can make a pot of coffee, you can make a pot of soup."

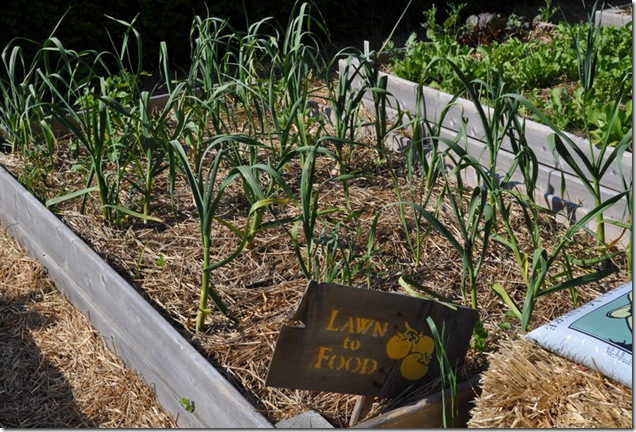
    This year I’ve have seen lots of people’s front yards with raised garden beds and “Lawn To Food” signs inside them. If you want to learn more about how to grow your own food, go to the “Lawn To Food” website for lots of information on planting a garden.

    But before you do that, have a look at the gardens, both in Dorothy’s yard and at one of the schools.

    May 2010 210

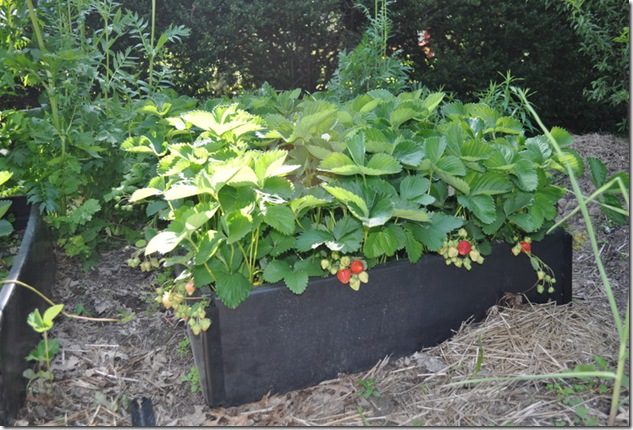
    Strawberries almost ready to pick:

    May 2010 191

    Beautiful red leaf lettuce and bibb lettuce:

    May 2010 208

    Flowers too – like these pretty roses.

    May 2010 199

    and beautiful irises

    May 2010 202

    And this beautiful chive flower that isn’t usually considered as a cut flower:

    May 2010 305

    And a bunch of them makes a lovely bouquet.

    May 2010 303

    Thanks Dorothy for the great baby lettuces I’ve been enjoying this week, the spinach too, and the chive flower bouquet.

    May 2010 315 

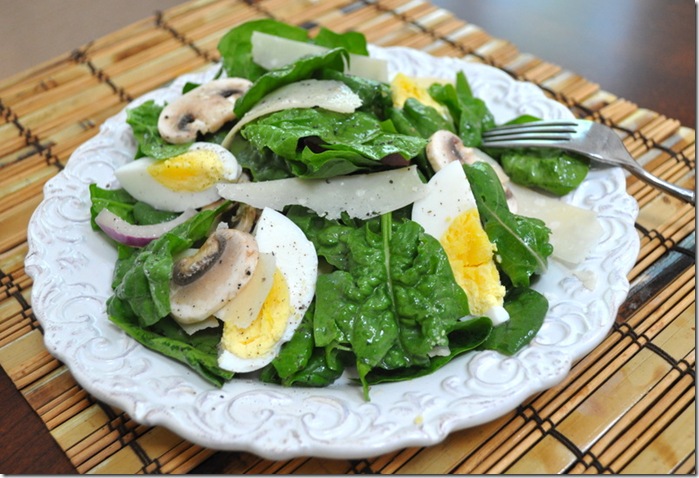
    Spinach Salad

    Printable Recipe Here

    (I don’t like the traditional hot bacon dressing used on spinach salads. I just use a simple vinaigrette, so that’s what I’m giving you here.)

    Wash fresh spinach and spin dry. Hard boil an egg, chill and peel. Cut the egg into quarters.

    Wash and slice fresh mushrooms. Slice part of a red onion. Put the spinach, onion and sliced mushrooms into a salad bowl and toss with salad dressing. Reserve some of the dressing to pour over the egg. Arrange on a plate or salad bowl and nestle sliced egg around greens. Top with shavings of parmesan cheese and freshly ground black pepper.

    Salad Dressing:

    3 parts olive oil

    1 part vinegar (red wine vinegar is what I used here)

    a small dab of Dijon mustard

    a small drizzle of honey

    salt, pepper

    Whisk everything together in a small container (or shake in a jar) and pour over salad.

    Wednesday, May 12, 2010

    Orange Pecan Cake

    May 2010 062

    When we lived in Rome, I’d buy blood oranges from Bruno, a fruttivendolo (greengrocer) in the Piazza San Cosimato, and my husband would squeeze fresh orange juice for me each morning. It was a ritual I missed when we moved back to the states. Sure you can find blood oranges here for a few weeks - oranges grown in California -- but they’re not nearly as good as those flavorful tarocchi oranges from Sicily.


    Bruno and tarocchi oranges in the Piazza San Cosimato

    What a surprise it was then on a recent trip to Costco, when I saw real tarocchi oranges from Sicily. I came home armed with a big bag of not only the tarocchi, but a bag of grapefruits, a pineapple and a huge papaya too.

    Sadly, though, the oranges fell short of the flavorful citrus fruit I had in Italy, but then again, between the time it took to get them across the ocean to New Jersey, and the limited amount of fruit that two people can consume in a given time, the oranges may have reached their peak before I got to them.

    So how to use up those oranges remaining in the fridge aside from a daily glass of juice? A quick perusal through my cookbooks and I turned up this cake in the Silver Palate Cookbook, which is listed twice, once as Orange Pecan Bread and again as Orange Cake (same recipe without the pecans).

    I don’t know why these recipes are called “breads” at all since they’re clearly cake-like, not bread-like. But for some reason, whenever you put the batter into a loaf pan, they become “breads” in most recipe books. Well I’m resisting, sticking with the cake moniker here. This is not something you’d serve with dinner – it’s a dessert, or to be eaten with tea or coffee as a mid-day break.

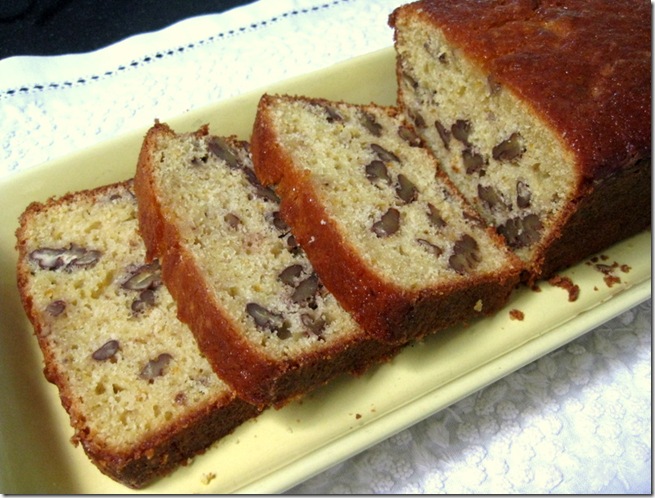
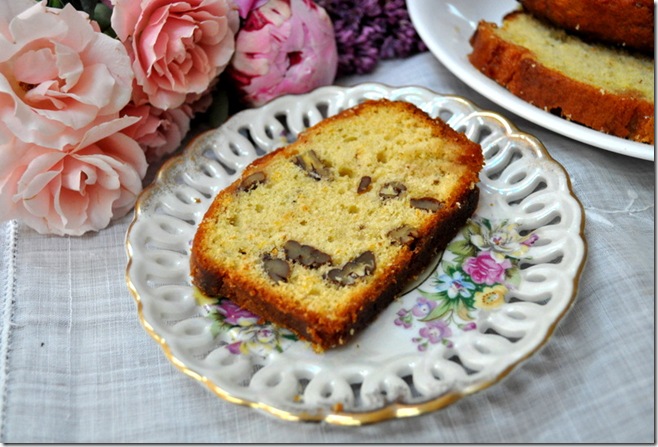
    The important thing though, is for you to try it. It is quite flavorful, great for storing in the freezer and easy to make. Well, you do have to beat the egg whites separately but even that is optional I discovered. The first time I made this, I dropped a bit of yolk into the white so I said, “oh forget it, I’ll just make it with whole eggs.” The cake came out fine. But I was curious to see what happened if you followed the recipe exactly and beat the whites and yolks separately. The result was a cake with a lovely “domed”  center. I’ve provided photos of both versions so you can see for yourself if you want to go to the trouble of beating the white separately.

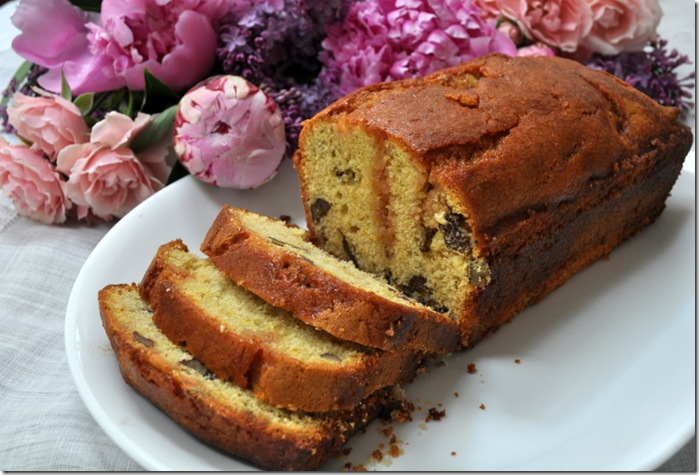
    The recipe also calls for a sweet glaze to be poured over the top while the cake is hot. This glaze really enhances the orange flavor. I poked some holes into the surface of the cake before pouring the glaze on top. Since the tarocchi are blood oranges, the cake has a darker hue than normal, and the syrup streaming down the center in this photo is much more vivid in color than ordinary orange juice.  This is a photo of the cake with the more “domed” top, made by beating the egg whites separately.

    May 2010 178

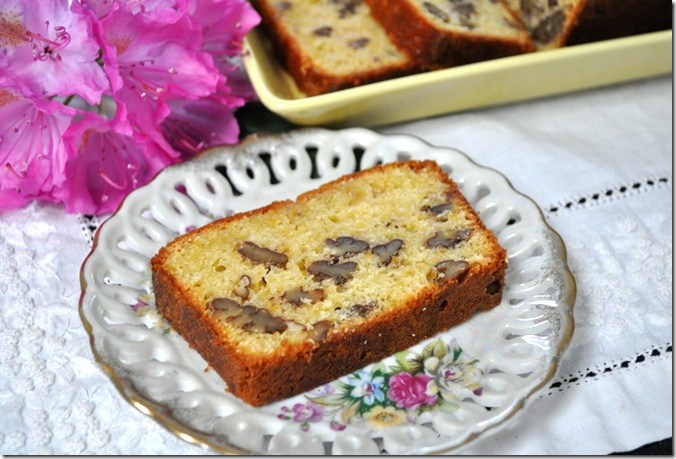
    And this cake (as well as the first photo with the single slice on a plate) is the one made by beating the egg white and egg yolk together. Just as delicious, but a flatter top.

    May 2010 076

    Either way, it’s worth making. You won’t be sorry.

    May 2010 183-1

    Orange Pecan Cake

    From The Silver Palate Cookbook

    Printable Recipe Here

    8 T. (1 stick) sweet butter, softened

    3/4 cup granulated sugar

    2 eggs, separated

    grated rind of 2 oranges (I used blood oranges, or tarocchi from Sicily)

    1 1/2 cups unbleached all-purpose flour

    1 1/2 t. baking powder

    1/4 t. baking soda

    pinch of salt

    1/2 cup fresh orange juice (about two oranges after straining out the pulp)

    1 cup shelled pecans, chopped

    Orange Glaze

    1/4 cup sugar (I used a bit more sugar and a bit more orange juice too to get a little more glaze)

    1/4 cup fresh orange juice

    1. Preheat oven to 350 degrees. Grease an 8 1/2 x 4 1/2 inch loaf pan.
    2. Cream the butter. Add 3/4 cup sugar gradually, beating with an electric mixer until light. Beat in the egg yolks, one at a time, and the grated orange rind.
    3. Sift the flour with baking powder, baking soda and salt, and add dry mixture to the batter alternately with 1/2 cup orange juice, beginning and ending with flour. Gently mix inthe pecans.
    4. Beat the egg whites until stiff and fold them carefully into the batter.
    5. Pour batter into the prepared loaf pan, set on the middle rack of the oven, and bake for 50 to 60 minutes.
    6. Meanwhile make the glaze by heating the sugar and orange juice together in a sauepan and simmering gently for a few minutes until a light syrup forms. Spoon the hot syrup over the cake as soon as it comes out of the oven. Cool in the pan on a wire rack.

    Saturday, May 8, 2010

    Spaghetti Ai Frutti Di Mare – Spaghetti with Seafood

    May 2010 028

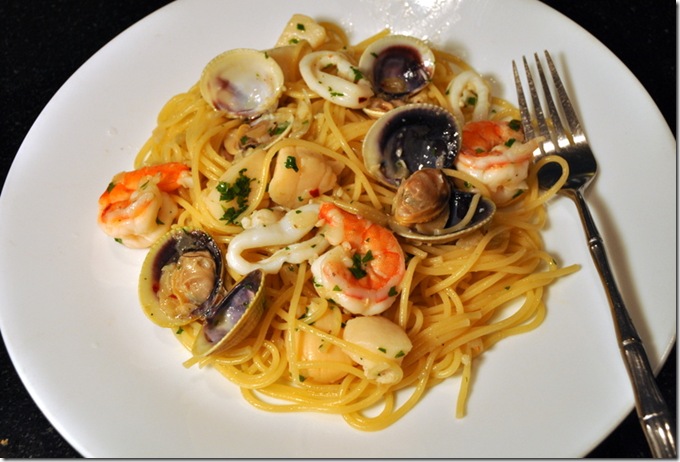
    Are you one of those people who orders pasta with seafood in a restaurant but never makes it at home? Fear not, it’s much easier to prepare than you think and so much better when you can pick and choose the seafood components yourself fresh from the market.  “But I don’t have time to cook,” is no excuse either since this whole thing comes together in the kitchen in less time than it takes to order out.

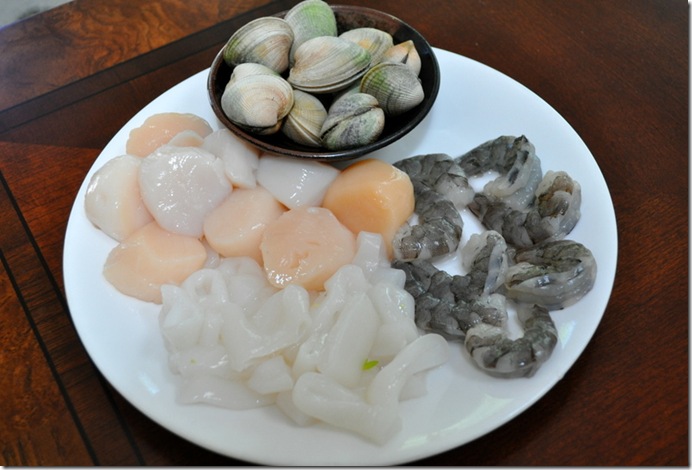
    It just takes a little forethought – like stopping at the market on the way home from work – something you probably do anyway. When I made this,  I was planning to use bay scallops but couldn’t find them, so I bought the larger sea scallops instead - cutting them into quarters. I also got squid, shrimp and some cockles from New Zealand. I like to include mussels in this dish too, but you normally can’t buy just a dozen or so – you’ve got to buy a huge sack of them, which wasn’t going to work in this meal for two people. You can add or subtract any other kind seafood you like.

    May 2010 020 This was also a good time to try out an olive oil I just received among a box of goodies from Olio2go.com. Check out their website and you’ll find not only an array of olive oils from nearly every region in Italy, but other products that are difficult to find here in the states, including a green tomato mostarda and mugolio, a pine bud syrup.


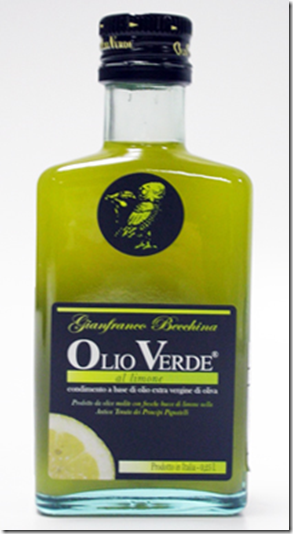
    image image One of the olive oils they sent was Olio Verde al Limone, an olive oil made by Gianfranco Becchina, whose olive groves in Sicily are interspersed with lemon trees. The olives and lemons are pressed together at the mill, resulting in a peppery olive oil infused with a bright citrus taste. It’s like summertime in a bottle. The two flavors complement each other perfectly, making the oil ideal for cold seafood salads, grilled fish, chicken or anything else your imagination can dream up.

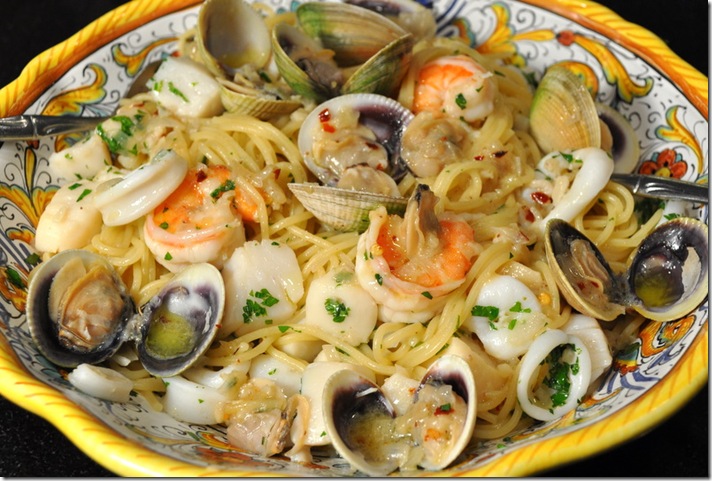
    image In my case it led to this pasta dish. I didn’t use the lemon oil olive for sautéing the seafood, just to drizzle on top after the pasta was put together. I wanted the fresh flavor of the lemon to shine through and I could be wrong, but I was afraid that heating it might alter it somehow.

    The lemon flavored olive oil drizzled on top added just enough of a citrus flavor without hitting you over the head. I can’t wait to try it in other recipes, but for at least last night, it hit just the right note in the seafood pasta. So try it yourself. I’ll bet you and whoever shares this dish with you will be fighting over the last bit of spaghetti and seafood. Just don’t sprinkle parmesan cheese on top or I’ll hit you with an overcooked noodle.

    May 2010 029

    Spaghetti Ai Frutti Di Mare

    (Spaghetti with seafood)

    printable recipe here

    (for two people)

    8 medium shrimp, shelled and deveined

    8 medium calamari (squid), cleaned and cut into rings

    8 clams (I used New Zealand cockles)

    1/2 pound scallops

    1/4 cup olive oil

    1 T. butter

    1 medium shallot, minced

    4 cloves garlic, minced

    1/2 cup dry white wine

    minced parsley

    white pepper

    red pepper flakes

    1/4 cup Olio Verde al Limone olive oil

    Get the water for the pasta boiling before starting the rest of the recipe since it takes only about 10 minutes to make start to finish. You’ll have three pots going at once – one for boiling the pasta, one for making the sauce and one for steaming the clams.

    Place butter and 1/4 cup olive oil in one pan with shallot and garlic. Cook over low heat until wilted. Add the scallops and shrimp and cook for a couple of minutes over medium heat. Pour the white wine into the pan and add the calamari. Cook for another minute or two, then remove the seafood with a slotted spoon to a bowl or dish. Add the red pepper flakes to the liquid. Turn the heat up to high and let the sauce reduce a bit. This should take a couple of minutes.
    While you’re reducing the liquid, you should start the pasta cooking in boiling, salted water. I used thin spaghetti that takes about five minutes to cook, but I removed it from the water after only four minutes when it was still al dente. Reserve some of the cooking water.

    While you’re cooking the pasta, steam the clams in another pan until they open – it should take about three or four minutes.  Remove from clams and set aside.
    Add the drained pasta to the pot with the reduced sauce.  Put the seafood back in and season with white pepper. Add the parsley and mix everything together. If needed, add a little of the pasta water. Drizzle the lemon olive oil on top and serve.